-->

Saturday 8 December 2012

Plans, plans, plans

I haven't done a lot of sewing recently.  The last month has been taken over by work mostly.  Now most of the fuss is finished with and I can get back to my regular hobbies.

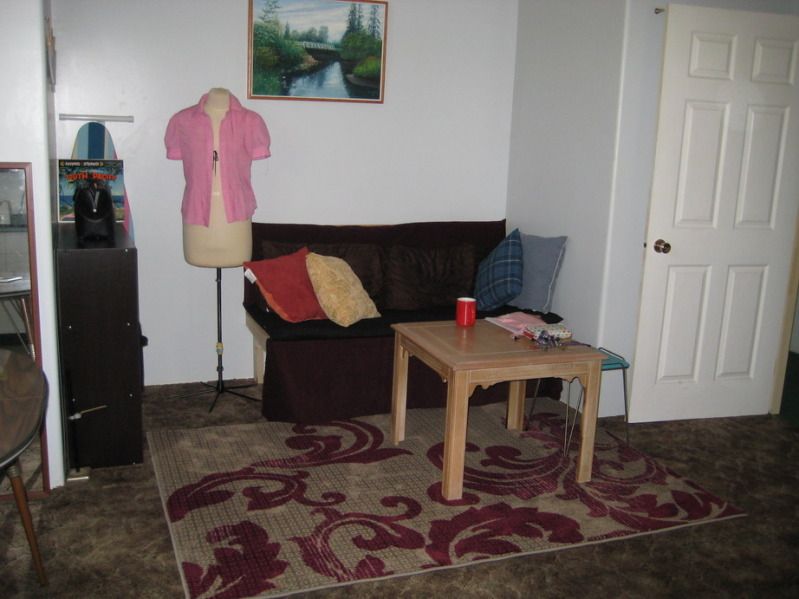
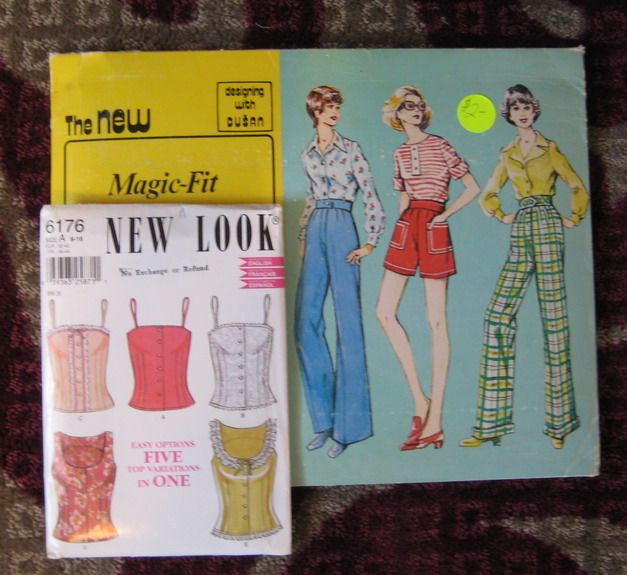
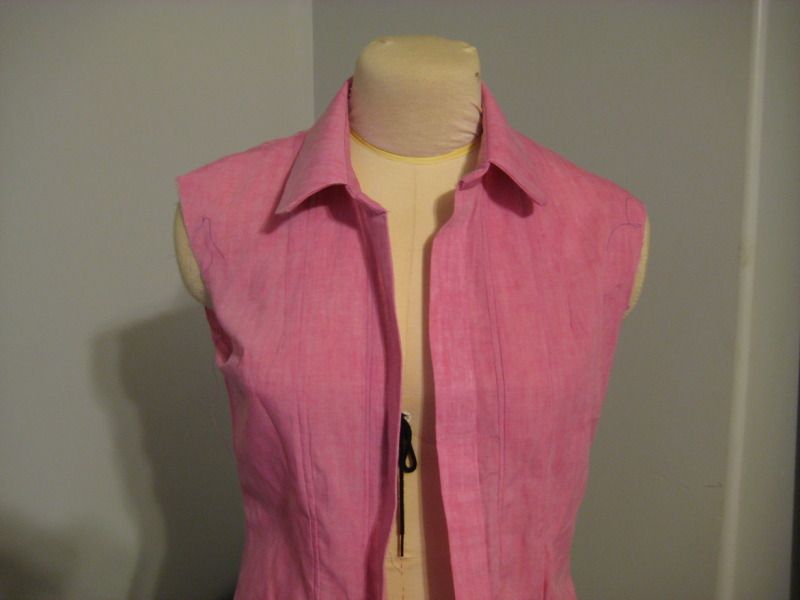
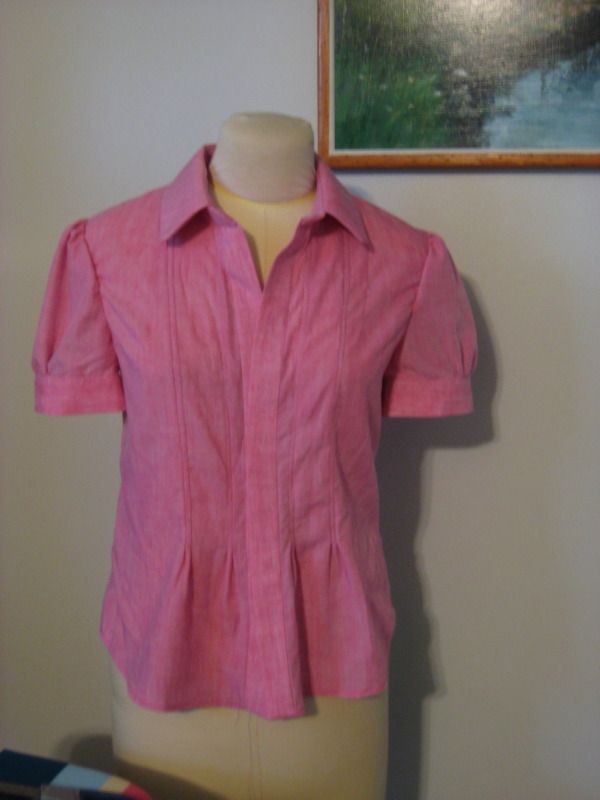
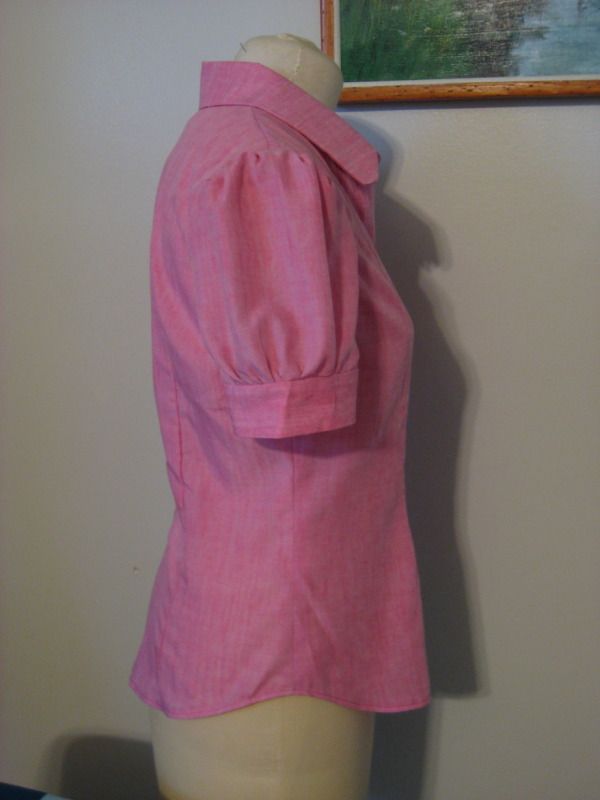
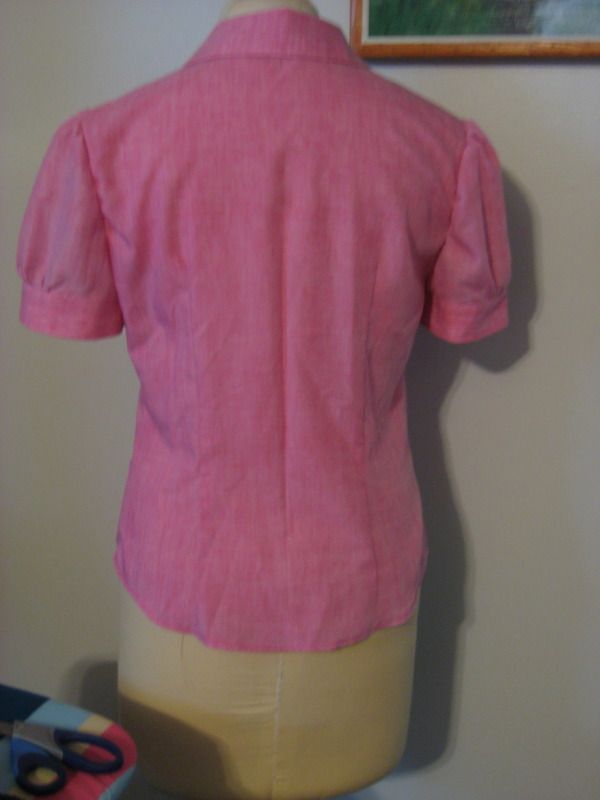
I went to the thrift store today and found the nicest suit jacket.  It is a men's jacket in a dark tourquoise color and the best part is it is 100% silk. For $3.00!  Sweet. I want to fashion it into a ladies jacket. I have been thinking about refashioning thrift store garments for a while now and since the blouse turned out so nicely I have a bit more confidence.

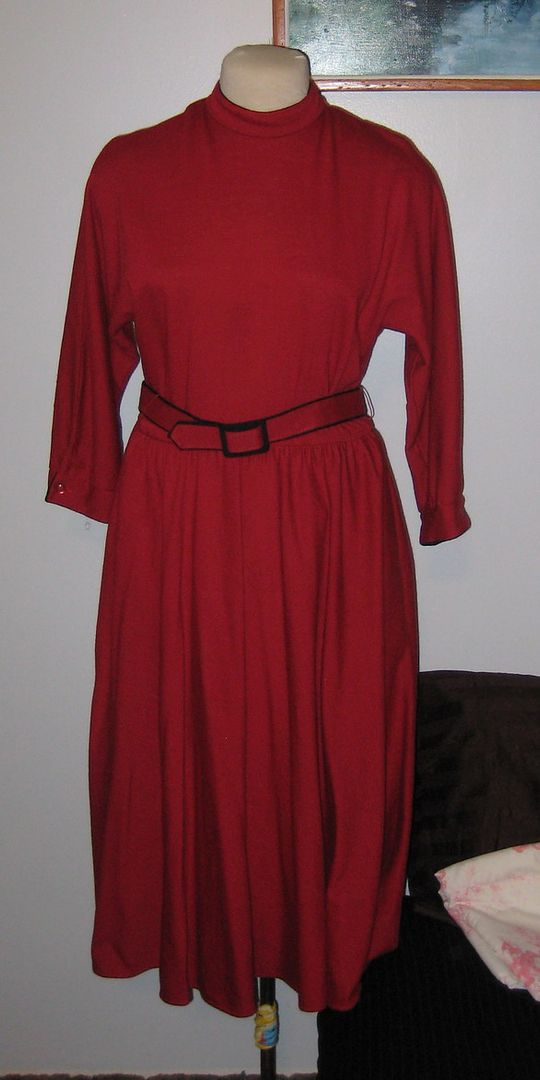
Slowly I have been picking out the stitches on this rather hideous red dress from the 80's.  I bought it because I really loved the colour of the fabric.  It is a pretty cherry red which I am always in favor of.  Although it does not have a care label anymore I believe it is made of some sort of wool/acrylic mix.  It is a little on the itchy side.

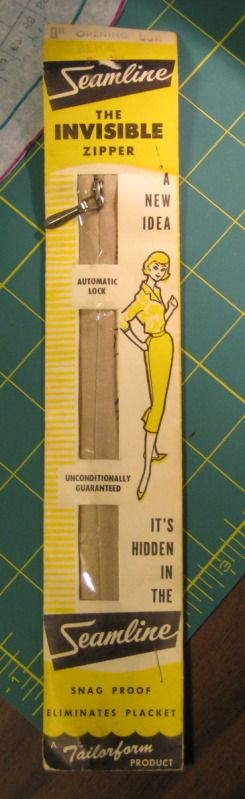
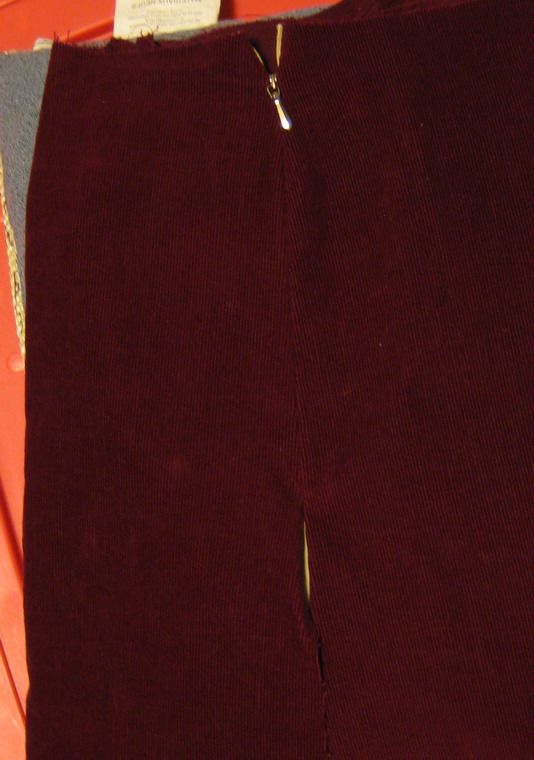
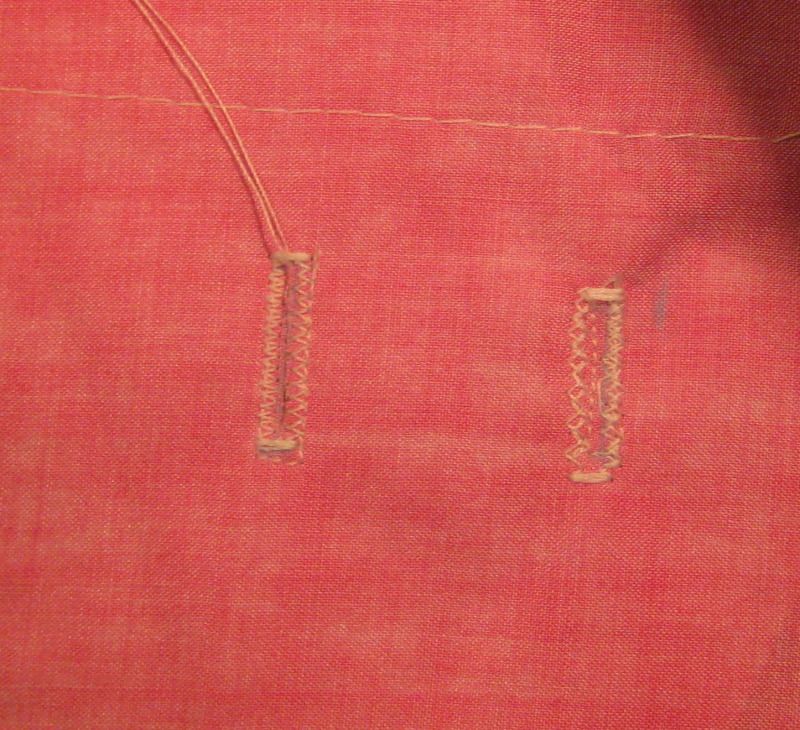
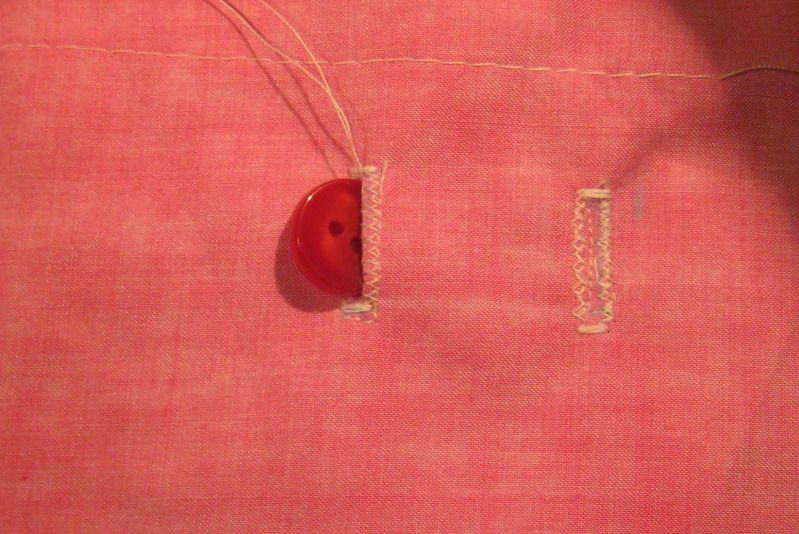
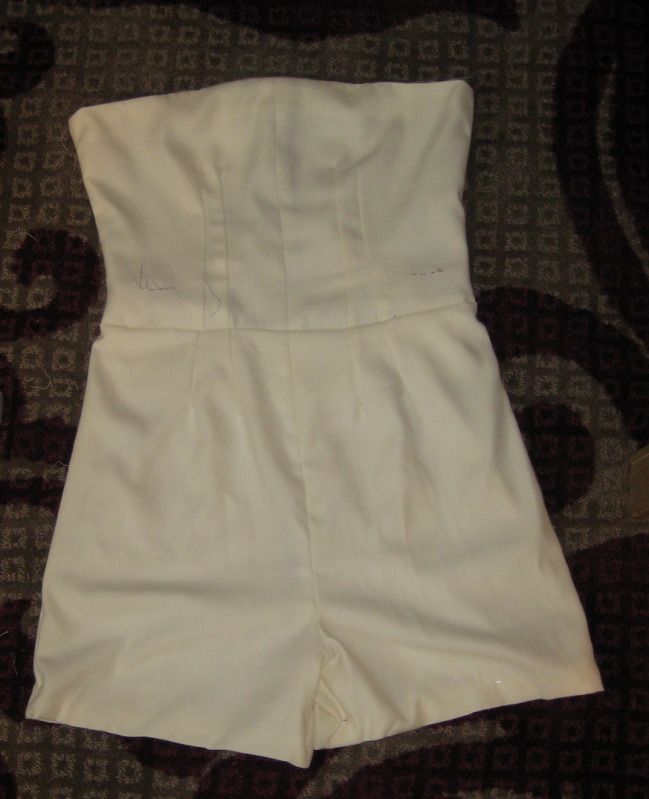
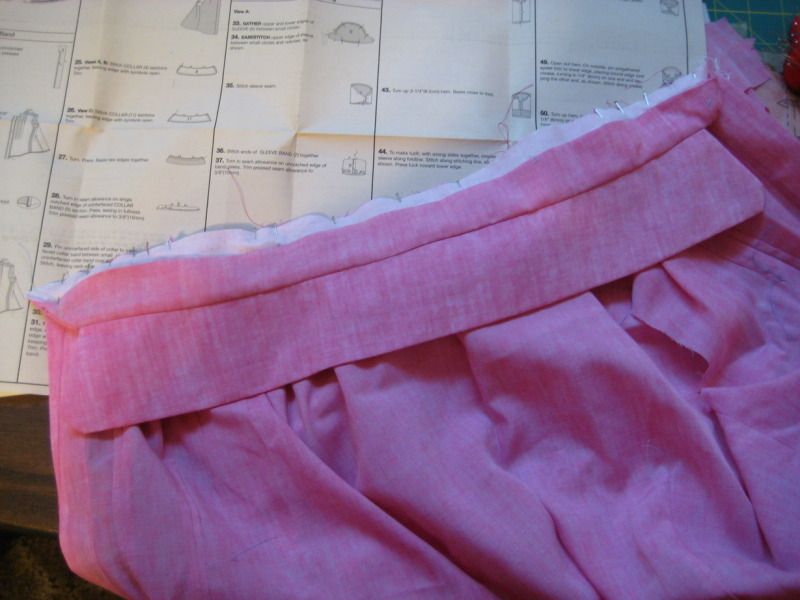
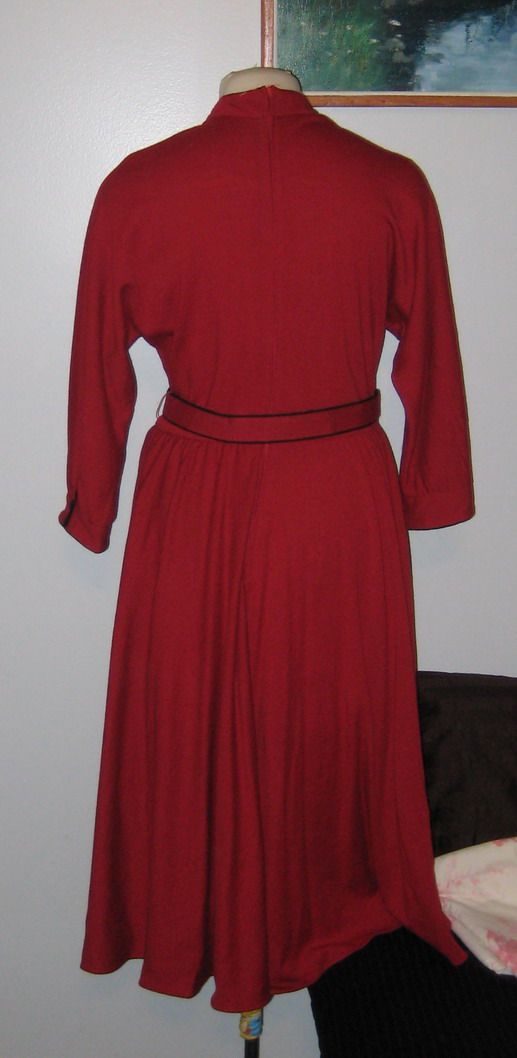
But look at all that fabric.  There area few pin holes so I am going to have to be careful how I cut my pattern pieces from it to avoid these spots.  I am also going to have to line it otherwise the itchiness might make me crazy.  The dress looks very well loved.  The zipper and the elastic around the waist have both been replaced over the years.  I cant imagine wearing it as is though.

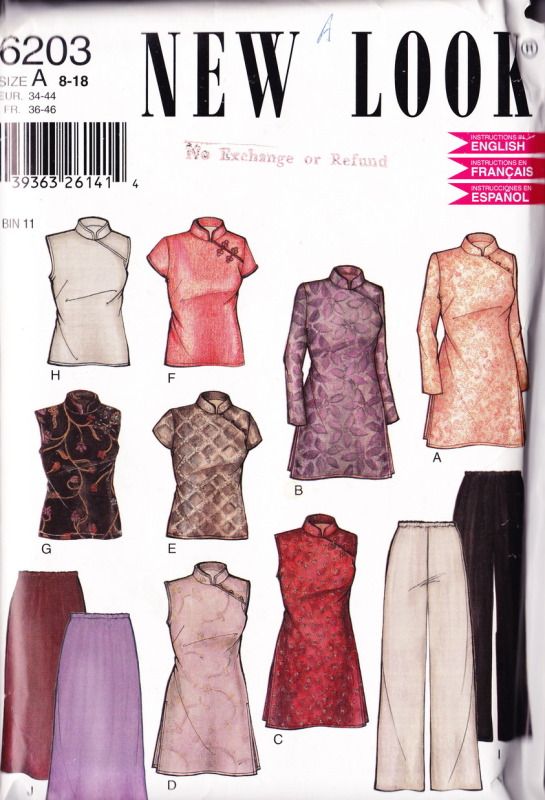
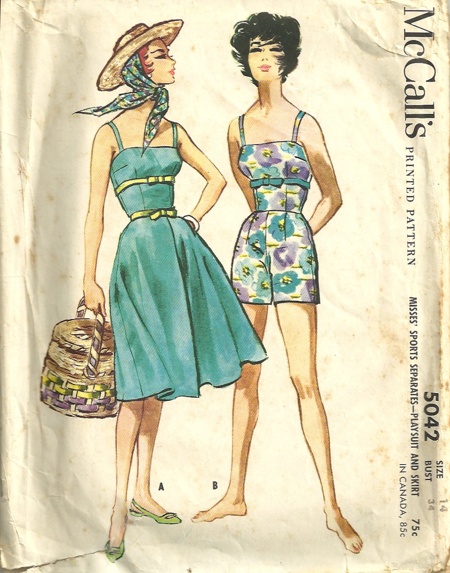
The plan is to turn the dress into something like this picture from the Modcloth website

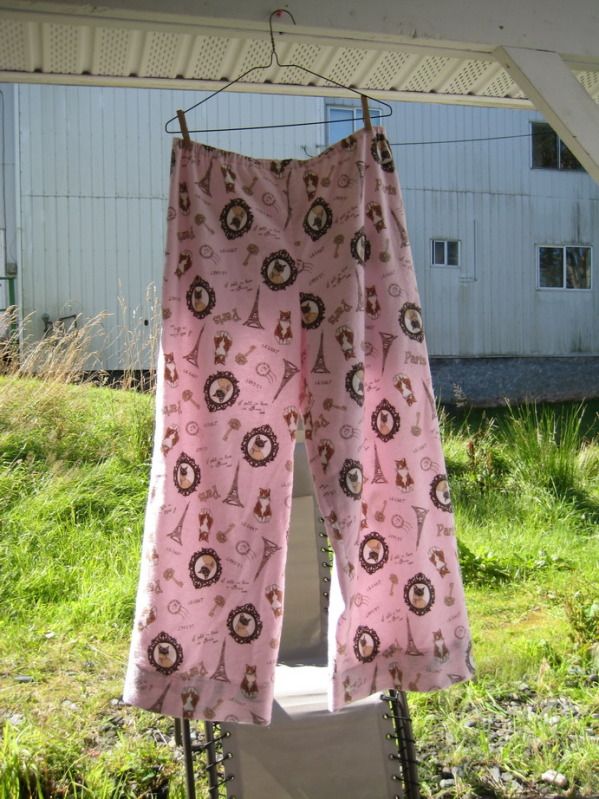
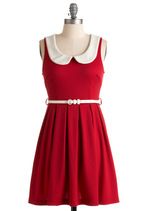
I plan to make it a bit longer but I like the styling.  I am just a bit concerned about the lack of sleeves.  Most of my dresses are sleeveless and I have found the Prince Rupert gets pretty cold.  It is never really sun dress weather here so sleeveless is a little impractical.  I always end up covering up my cute dresses with cardigans to keep warm.
I also have plans to make a dress with long sleeves.  I don't think I have owned a dress with long sleeves since I was in elementary school.

I am tempted into making it into something more like this.  I like the darts used and I am hoping I can get it to fit like in the picture.  Sometimes the pictures on these old patterns are very inaccurate as to what the garment actually makes up into.  Many times I have looked at a reissued pattern and the drawing makes it look like something out of a movie, but once the garment is made up the average person (or the live model wearing the garment) it looks really crappy. (Pattern companies also seem to use some of the most ugly fabric to make up their patterns.  I mean, light pink satin?  Are you kidding? ).

Anyway, here is hoping that something good comes from all this.

Random Rupert

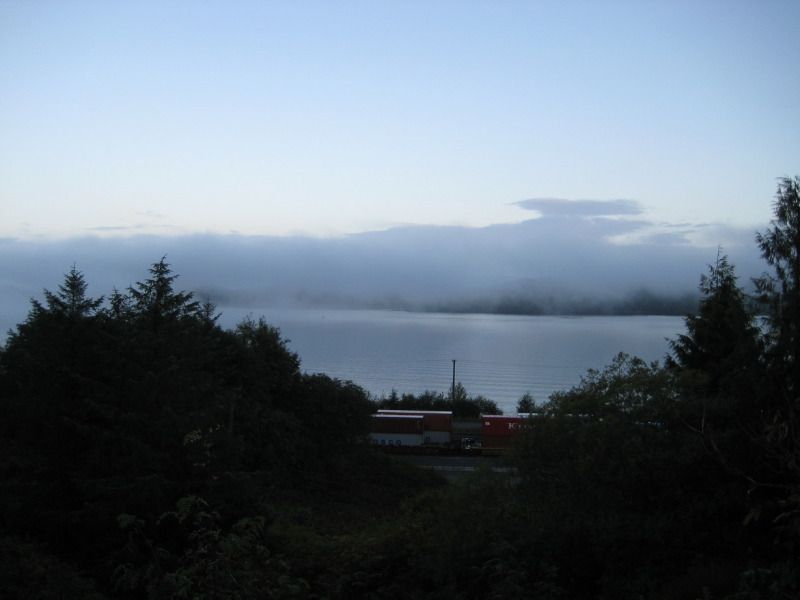
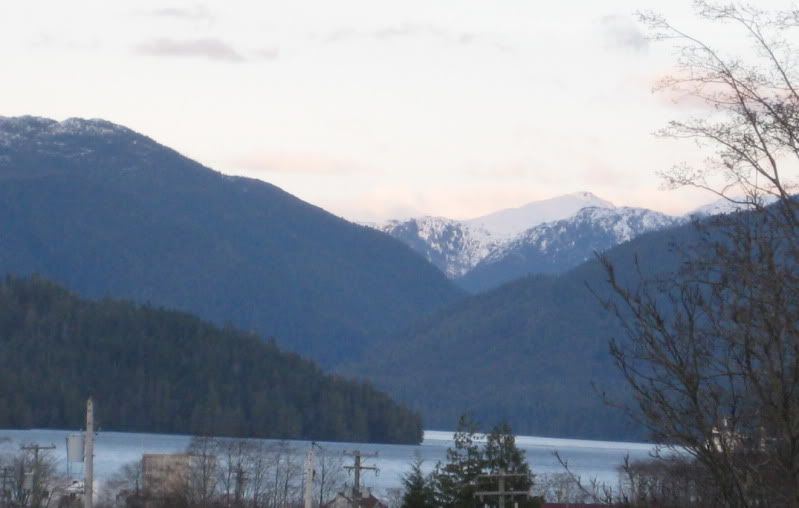
Did I mention it is snowing here? It has been snowing off and on for the last couple days and I think we have about 1 1/2 inches or so.  It is very pretty.  The snow has been up on the mountain for a while but it is only recently that it has gotten cold enough to come down to us.  I did not get a nice picture of the snow here, but here are a couple of the snow up on the mountains.

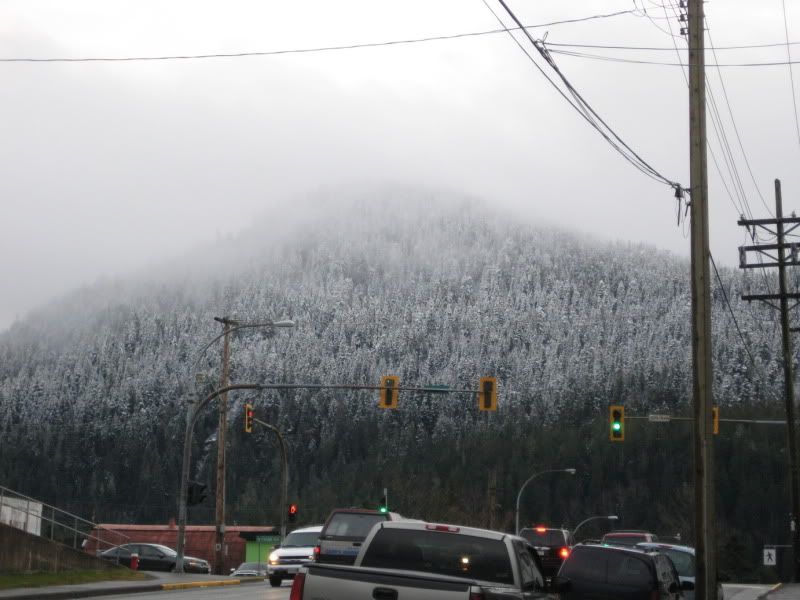
This is the mountain which is right in the middle of the island which Prince Rupert is on (Kaien Island).

I like the last of the sunrise in this one. I have no idea what mountain that is.


Thursday 25 October 2012

Invisible zippers

Burda pattern
The burda skirt pattern (left) which I moaned about in a previous post is this one.  I am making it in a wine coloured corduroy which I bought from the thrift store for a couple bucks.

The burda skirt has introduced me to a new skill.  Installing an invisible zipper.  Somehow I have avoided invisible zippers up to this point, but after hearing good things about installing one I figured it was time to try it out.

Conveniently I found this one at the thrift store new in package.  Pretty cool.  It has instructions inside on how to install the zipper but they were really confusing.  Lucky the internet saved me yet again. This invisible zipper tutorial from the Colette pattern site was really helpful as it has step by step directions with pictures. When it comes to sewing I find pictures to be really helpful.

Yet again I am amazed by the coolness of sewing machine feet.  One thing I got from my grandma was an envelope full of what looked like small lego pieces.  Turns out these pieces actually constitute an invisible zipper foot and shank attachment.  Pretty neat.

After a bit of fussing I finally figured out which shank piece fit my machine and it was onto figuring out the zipper.  Turns out sewing in an invisible zipper is kind of complicated.  with the Colette site's help though I was able to finally get the zipper in with only a small amount of frustration.  I think it worked pretty well.  Invisible?


Wednesday 17 October 2012

Burda Insanity

I have started something new.
 
I recently discovered Burda magazine which is a nifty mag from Germany (but has been translated into many languages as well as English) which has lots of neat patterns.  What I like about Burda magazine is that although there are about 50 garments in each magazine to sew many of them use the same patten pieces.  This is neat as it shows how one pattern can really be done in many ways.

Burda does issue a challenge though. See below.

No, not the London Underground map

This is one page of 4. Every pattern is on one of these sheets in different colors, lines, sizes. It is insanity for the eyes.  Apparently in the early 90's the patterns used to be on 8 sheets and were actually readable. Not so much anymore.

I was very happy I picked a very simple pattern for my first try at Burda magazine.  Otherwise I might have gone insane.  The first thing you have to do is find your pattern and trace it onto pattern paper.  This would be fine, but my eyes just could not stay on the correct lines.

After much annoyance and cursing and a very large head-ache I came out with this:

Not to bad.

What I find hilarious about all of this is I have sewn garments from Japanese magazines where all I got was some measurements for the patterns.  Yet that was so much more simple than trying to trace out this Burda gobbledygook.  Even the explanation in the Burda magazine is so much harder to follow than the instructions in Japanese magazines and those were in a completely different language!  So wierd.

Burda magazine is pretty sweet though.  Most of the patterns are quite nice and it is really fun to have so many patterns in one magazine.

Burda is also cool as although there will be around 50 or so different patterns in each magazine many of them are variations on one base pattern.  For example there will be a basic jacket pattern.  The there will be the same pattern but with a different collar, or in a different fabric etc.  So you can really see how one pattern can be made many different ways to make all kinds of different looks.  That is really neat.  Wish there were more magazines like this.  Go Germany!

Sunday 14 October 2012

Pink Blouse is finally complete

This post is two weeks late, but here are pictures of the finished pink blouse.

I am really happy with how it came out considering it started out as a white BC Ferries bed sheet which I bought at the thrift store for $.50.

I dyed it pink,

And made a blouse out of it.
Even the buttons are recycled as I got them from Grandma's button box.  So all I bought new for the blouse was the interfacing which was stolen from the leftovers from another project and a couple spools of thread which Zellers conveniently supplied on sale.  Finding a thread that generally matched this colour was a surprise indeed.  So overall this blouse is about the cheapest thing in my wardrobe.  Nice.  I am now thinking of ways I might be able to refashion clothing and other items into things I can wear.

As the bed sheet was very well worn I can at least be sure that it is not going to shrink in the wash or anything.  Also, it is a polycotton blend which gave the dye job a very interesting pattern and means that it is not going to wrinkle either.  I hate ironing so this is great.

Overall I am really pleased with the pattern and I am definitely going to make a couple more blouses out of the actual cotton fabric I bought a while ago to use with this pattern.  This pink was really just meant to be a wearable muslin but I like it so much it has immediately gone into rotation with my other work outfits.  It also looks great under a vest.

I think the only change I will make next time is I might add 1/2" to the sleeve cuffs so they are a little looser and maybe make the puffed sleeves look a little less like a leg o'mutton sleeve from the 1890's.

I hope the next blouse will not take as long as this one did.  I think I started it before I got a job in Prince Rupert which was about 2 1/2 years ago.  Yes it spent a lot of time as a UFO, but mainly because button holes scared me.  Now that I am button hole competent I am less concerned about making the shirt dress pattern I have which is pretty sweet.

Random Rupert:

Because I thought the clouds/ fog looked pretty that morning.


Tuesday 25 September 2012

Look at my Buttonhole!

Yes, it is true.  I still have not finished the pink blouse.  I have been sissying out on that for months.  On Sunday I decided I was going to do something sewing-wise everyday this week.  Yesterday's goal was to finally master the buttonhole.

I had tried to create a button hole a while ago on regular fabric but it had ended...badly.  My zig-zag stitch was all puckered up, my fabric was bunchy and it just looked bad.  Not something I wanted to put on my blouse.

I figured I would try again and use a fabric combination which was as similar to my blouse button placket as possible.  So I fused some interfacing to my blouse fabric and doubled it over and away I went.  Hello internet instructions.

The right hand button is try number 1. I followed an example on "About.com" and was not very pleased.  It just looks messy although the interfacing and me fussing with the tension has helped with the zig zag stitch.

Not completely happy I searched the internet some more and came upon Sewing 101 's instruction using a button hole foot.

'Hey' I think. 'Don't I have something that looks like that in my sewing box?'

After much digging and grumbling and wondering if I had just imagined it, I came across this darling.

This lovely foot is my savior.  Suddenly buttonholes are all happy and straight and pretty (well mostly. I still have to practice).  The button hole foot created the button hole on the left. Not too bad.  It was really easy to use too.  

Even a button will fit through it.
So this weekend I WILL finish my blouse and I WILL wear it on Monday!

*Happy dance*


Sunday 16 September 2012

Sleeping can be cute

When I went home in August for my friend's wedding, I admit, I had ulterior motives.  Shopping.  Fabric shopping.

Recently I found myself dissapointed as I realized that the first pair of flannel sleep pants I made about 5 years ago had finally worn out.  I am talking distressing holes in the behind.  So I had a goal to find a new cute flannel print to sew a second pair.

The the first pair was made from this New Look pattern which I purchased a long time ago.  Originally it was bought for the cute chinese shirts but I have never made the shirt.

When I was thinking of making a pant though, I thought of this pattern once more.  It is a really basic wide leg pant and the best part is it only has two pattern pieces!  The waistband is just rolled to make a casing for the elastic so overall this pattern only take about 2 hours  this weekend to sew. 

Here is the final product:

The elastic I used for this pair was better than the last.  Much more comfortable.

 Here is a close-up of the easy waistband:
Nothing to it!  I would definitely recommend this pattern to anyone trying pants for the first time.  Pants can be a bit annoying and I have sewn the legs wrong before.  (When you do you end up with a skirt, not pants.  Argh!) It was nice to make something that did not involve a lot of detail work.  Instant gratification sewing.  Nice.

With the cold weather looming once more (Did it ever really leave?) I have been thinking about sewing some heavier dresses and more items which can be layered.  I did buy a great 20's style hat which I am hoping will be good in the fall.  Unfortunately I have to style my hair right (meaning a style which makes it look shorter) or it looks kind of silly.  I love the color of it though.

Random Rupert

There is a new Thrift shop in town called Paws and Claws.  It opened early this summer and the people who run it are simply marvelous. 

Prince Rupert and Port Edward have a big problem with feral cats.  Especially in Port Edward this has become a major problem as good hearted people feel the animals, feeling bad for them, but this has allowed the population to explode.  Sadly the cats are not healthy.  Most of them have ear mites, diseases and are many are in distress because of other health issues.

This thrift shop opened to raise money to spay and neuter these cats and get them medical attention.  The SPCA is already very busy and very underfunded and are really at a loss as to what to do about all these cats.


The owners are really great and will even deliver furniture for you which is a step up form the local Salvation Army Thrift store.  The Prince Rupert Salvation Army store philosophy is if you cannot take it with you at that moment, you can't have it.  Very uncool when your just dropping in on your lunch break and find the perfect table. :(  I have been very lucky getting vintage sewing patterns from them though.


Anyway, this is my newest discovery at the Paws and Claws thrift store.  As you can see it is a 1950's wall clock.  It is so cool and looks awesome in our kitchen.  I just love the eggshell blue colour which was so popular back then.

It makes this subtle purring sound as the second hand moves which is so much nicer than the tick that most clocks make.  Now I don't have to rely on the microwave for the time anymore.  Being a plug in clock it does not solve the problem of telling the time when the power goes out. 

Oh well, cant have everything.


Monday 3 September 2012

Couch Happens

Earlier I mentioned in passing that Hugh and I met another couple in Prince Rupert.  Yay friends!  Anyway,  this inspired the need to be able to invite this couple over to our house for dinner sometime. This is when I started looking around at our place a realize how sad it really is.

Hugh and I are slowly accumulating a few nice pieces of furniture, but the majority of our apartment is still made up of rubbermaid containers and flatpack furniture.  Yes, we never really grew out of the student phase when it comes to home furnishings.  A lot of it is the fact that we still rent our home and have the potential to move a lot and collecting stuff means we will have to pack it or sell it when we move. Annoying.

But this means that the idea of having friends over to our apartment freaks me out.
 
One problem we have with our apartment in regards to future entertaining is a lack of seating in the kitchen area.  I have an old dining table which serves double duty as a sewing table, but we have no chairs.  I sit on a old rubbermaid type container when I need to use the sewing machine.

Here is what the empty wall in the kitchen looked like before we decided to do something about it.


So I decided I really wanted to get some seating organized for the kitchen area.  After looking around at sofas at the local furniture stores we quickly realized that there was no way we were spending $800 on a sofa so we decided that we would build one instead.

Unfortunately we did not really have much in the way of tools besides a hammer, a wrench and a few other odds and sods.  I decided I wanted a powerdrill.  After much discussion with my dad and research on the internet I finally found want I wanted and we were ready to go. (Buying a corded powerdrill in Prince Rupert is surprisingly difficult).

Our sofa bench had to be able to fit in our space and be high enough to to fit some of our other rubbermaid containers underneath. (Hidden storage rules.) It also had to be made with the fewest cuts as we we had to ask Home Hardware to cut the wood to length.

This is the base of the sofa put together. Well, most of it anyway. Note the cool powerdrill next to Hugh.  That was my anniversary gift.  I always ask for very nontraditional anniversary gifts.


And here it is all finished.


It was made out of 2X4's (which apparently are no longer 2"X4" anymore, thieving companies) and one sheet of 3/4" plywood.  In total to cost about $60.00 for the wood.

I also made the cushions out of mattress toppers from the local Fields store which was going out of business and old blankets.

Twin blanket sewn together waiting for some foam
And then I covered it with some fabric I had in my stash and it became the above picture. Out of leftover corduroy fabric from this jumper I made a cushion for the backrest and used the last of the fabric to edge the bottom of the sofa so the bins could not be seen anymore. 

I purchased a rug and with some reorganizing my ugly wall became this:


Did you scroll up to the top to see the original space?  Before and after!
Pretty neat huh?

I bought the pillows and plan to one day recover them with some pretty fabric.  The table in front came from the thrift store for $12 including delivery. The rug is a Home hardware find.

For reference here are a few more of the kitchen.

another angle
there's the sewing/dining table
yes there is carpet in the kitchen

It has worked out pretty well.  When we had guests over for dinner we moved the smaller table and moved the dining table up to the couch and Hugh and I sat on stools.  Yay seating for four!

Anyway, I am much happier with the kitchen not looking so horrible.  Amazing what the potential for guests will do for your initiative. :)  Now I don't have to be embarrassed if someone comes over to visit.


Tuesday 7 August 2012

Franken-suit

Eh gads I cannot believe how long it has been since the last post.  So much for my once a week plan.  I shall try to be better.

As some of you know, when I get interested in something, I get a bit obsessive.  Pianos, boots, tecras by the time I am finished I feel like I  know just about everything about them and my husband is sick of hearing about it.

I have now moved onto the playsuit.  I love the idea of having one item of clothing which covers the body all at once.  Thus my love for dresses and jumpers.  I am not so good at matchy matchy so these items allow me to be dressed quickly with the minimum of fuss.


As a result, recently I have been spending a lot of time on etsy looking for a 1950's or 1960's playsuit.  

For those who are unfamiliar, the girl on the right is wearing a playsuit.

I discovered this one (below) on etsy and fell in love.  I still want to buy it, but it is pretty expensive.  There is also the issue that the bust is 2" too big and I just cant get myself to pay that much for something I would have to alter myself anyway.  It is so super cute though!
The lovely suit of awesome

So, with price being an issue and I was unable to find one which had a nice patterned fabric and actually fit, I decided that sewing the playsuit myself  would be the best option. 


I did buy this pattern (left) a couple weeks ago,  but it has not arrived yet and as I am an impatient person so I decided to design my own.

There is also the issue that it is a tie waist rather than darted but at the time I figured it would be a good start


Thus began the Franken-suit

I used two patterns for sizing: 

A 1970's pant pattern and a summer top.  I drew out new pattern pieces with some changes.  I took out the button band at the front of the top and put in a seam instead.  I also added a seam to the back of the top where a zipper was to be installed.  Finally I moved the darts to try and match then when joining the top to the bottom.

After much sewing and testing I came up with a decently fitting muslin. 


Here is the final product.  I plan to make it strapless if possible but adding thin straps would not be too hard if I decided I did not feel comfortable.

I next want to mock this up in some of my thrift store fabric and see how it looks completely finished off. (I did not finish hemming the shorts and the whole thing needs to be lined in the end I think.

Overall I am pleased with how it came out.  It still needs some tweaking but I was able to take some of the problems with the muslin and fix them on the original pattern so hopefully the next version will be better.

The pattern design and creation of the muslin took about 9 hours total on Sunday.  Being unable to stop when I am in the middle of a project, I worked until 1am that night so I was pretty tired on Monday.  Lucky it was the BC day long weekend and I did not have to do much the next day.

So next weekend, the plan is to mock this up in a patterned fabric and see if I can line it as well.

And now for more Random Rupert

Hugh and I recently discovered Morse Creek Park.  It is a 10 minute walk from our apartment and made us both wonder how we had not known about this in the two and a half years we have been here.  It is essentially a walk around a large pond which was created when they built a dam at the exit of the creek.  I am not sure why they decided to do this, but it looks very pretty.

I worry sometimes about bears and wolves being in the area, but they mostly stay up the mountain and I figure with the amount of people walking their dogs as well, Hugh and I should be okay. 

Tuesday 26 June 2012

Collars are Complicated

The blouse has slowly chugged along.  It is helpful that I have obtained things such as ironing boards.  Ironing on the table was such a pain.

I am learning so much from this blouse.   The collar was really starting to feel like an origami project though.  I had to keep rereading the instructions just so I could get all the pieces sewn together the right way up. But in the end patience and stubbornness won the day.


Here is the hick version without sleeves.

I finally was able to put the whole thing together this weekend.  Getting the gathers even on the sleeves was a bit of a challenge.  I am looking forward to making this again now that I have figured out most of the tricks.  Sewing a second blouse should go much faster.

And here is the almost finished blouse.  Ta daaaaa!


I am hoping that the wrinkles will come out with a bit of ironing. It also fits pretty well although it is a little tight under the arms. Something I will have to address with the next one. Have you noticed what is missing? Yup, still no buttons. :) That is my project for this weekend.

Issues I had with this blouse:
  1.  I put the pin-tucks in backwards by accident.  I actually like it better this way on this blouse because the thread I used was not a perfect match for the fabric colour and as a result it pretty noticeable.  Because of this, the pin-tucks look terrible on the other side.  I guess they are officially pleats now. 
  2. I really need to make sure I iron the iron on interfacing onto the correct side of the fabric.  As a result I had to be a little creative with my sleeve cuffs but it all worked out in the end.  Man that is a beginners mistake though.  I was very frustrated with myself over that one.
Overall I think I may keep this blouse this pink colour,  I was thinking about dyeing it a more rose pink/purple but I am kind of loving the bubblegum.

I am definitely planning to make a few changes for the next blouse I make.  I would like to add a more peter pan type collar to the next one and fix the fitting of the armholes and sleeves so they are a bit less tight.

With luck I will be able to take it out on the town on Tuesday for work.

Stay tuned for home reno crafty fun!

Finally some Random Rupert

Every day I walk to work.  Here are a few pictures of what I see along the way.
As you can see it is pretty quiet in the morning. Recently it has been a nice walk as it is not quite as cold. Prince Rupert also smells really good right now. I really hope we have a nice hot summer this year. I am tired of the rain.
Crafting in Progress!
Gray Cardigan
20% done!
Bubblegum Blouse
100% done!
Cranberry Skirt
70% done!